We’ve rolled out several improvements to make your daily clinic operations smoother, faster, and more patient-friendly. Here’s a quick look at what’s new and how you can start using these features.
A. Visual Patient Demographics
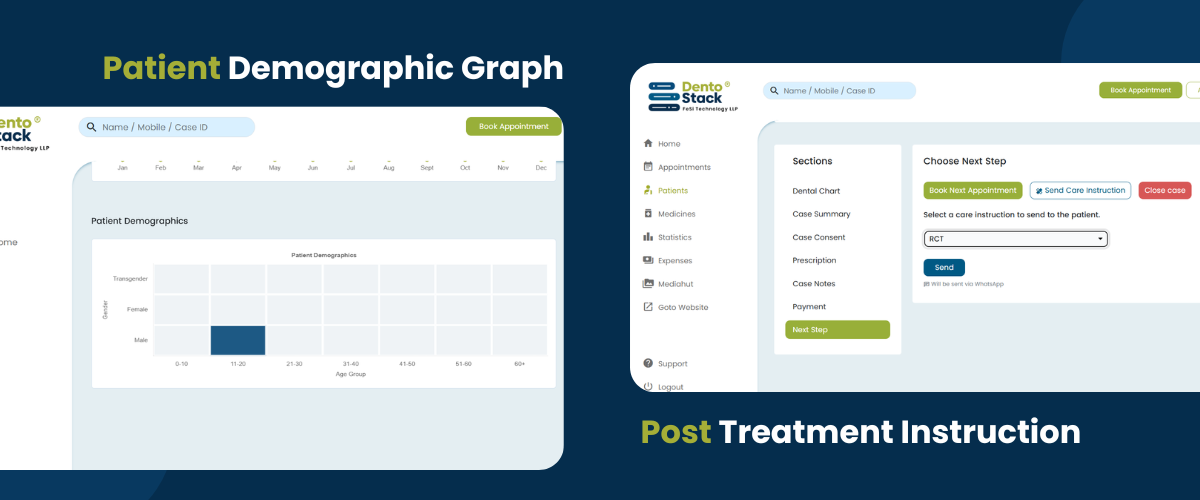
We’ve introduced a new demographic graph that provides a clear visual representation of patient trends. The graph displays a heat map showing the number of male, female or transgender patients visiting your clinic over a month, categorised by age groups.

Why we need it ?
Understanding patient demographics helps clinics make better decisions around services, staffing, and marketing. This feature gives quick insights into which age groups and genders are visiting more frequently, helping you plan more effectively.
How to use it or enable it ?
No action needed. The demographic graph is automatically available in your dashboard. Simply navigate to the "Statistics" section to view and interpret the data.
B. Quick Reschedule with Drag & Drop
We’ve introduced a drag-and-drop feature in the appointment calendar, allowing you to quickly reschedule appointments by simply moving them to a new time slot.
Why we need it ?
Manually editing appointment timings can be time-consuming and prone to errors. This feature makes rescheduling faster, more intuitive, and helps manage your schedule more efficiently.
How to use it or enable it ?
No setup required. Just go to your calendar, click on an appointment, and drag it to your desired time slot to reschedule it instantly.
C. Discounts in Estimates
We’ve added the ability to apply and display discounts directly within estimates, making it easier to offer flexible pricing to your patients.

Why we need it ?
Providing discounts is a common practice, but handling them manually can lead to confusion or calculation errors. This feature ensures transparent pricing and helps maintain accuracy in your estimates.
How to use it or enable it ?
No setup required. While creating an estimate, simply enter the discount amount, and it will be automatically applied and reflected in the total estimate.
D. Payment Reminders via WhatsApp
We’ve expanded payment due notifications to include WhatsApp, in addition to SMS. This allows you to reach patients on a more widely used and convenient platform.

Why we need it ?
Relying only on SMS can limit reach and engagement. With WhatsApp, patients are more likely to see and respond to payment reminders, helping you improve collection rates and reduce pending dues.
How to use it or enable it ?
No setup required. Whenever you send a payment due notification, the system will automatically give you the option to choose between WhatsApp and SMS. There’s no need to enable or configure anything—just select your preferred channel at the time of sending. Just make sure patient contact details are updated correctly.
E. Post Treatment Care & Guidelines
We’ve introduced a post-treatment care feature that allows doctors to easily share Post Treatment Guidelines with your patients. You can create and manage a list of care instructions based on your preferences, and select relevant ones to send to each patient.

Why we need it ?
Explaining post-treatment instructions manually every time can be repetitive and time-consuming. This feature ensures consistency in communication while saving time and effort for doctors.
How to use it or enable it ?
While updating or completing a treatment, simply select the relevant Post Treatment Guide from your predefined list and send them to the patient instantly.

Steps to create your predefined care instructions list:
- Go to the Admin Panel and select “Care Instructions”
- Click on “Add Instruction” and enter the required details
- Save your instruction — Done!
Once added, these instructions will be readily available for selection during patient treatment updates.
F. Manage Appointment Settings
We’ve introduced a new Appointment Settings feature in the admin panel, giving doctors more control over how appointments are scheduled and managed.

Why we need it ?
Different clinics and doctors follow different workflows. Some require strict control over who starts an appointment, while others need flexibility in booking slots or offering virtual consultations. These settings help streamline operations, avoid conflicts, and improve the patient booking experience.
How to use it or enable it ?
Go to the admin panel and access Appointment Settings. You’ll find the following options:
- Strict Start – When enabled, only the assigned doctor can start the appointment. Other doctors won’t be able to interfere or take over.
- Strict Booking – Choose whether to allow overlapping appointment slots or restrict bookings to one patient per slot.
- Virtual Appointment – When turned on, patients can select between in-clinic and virtual consultation while booking an appointment.
Additionally, a new Patient-Facing Appointment Notice section is available. This allows you to display important instructions or information (such as guidelines, preparation steps, or policies) directly on the appointment booking page, ensuring patients are well-informed before confirming their booking.